A Body Hair Trimmer for Men by Body Area and Length Goal
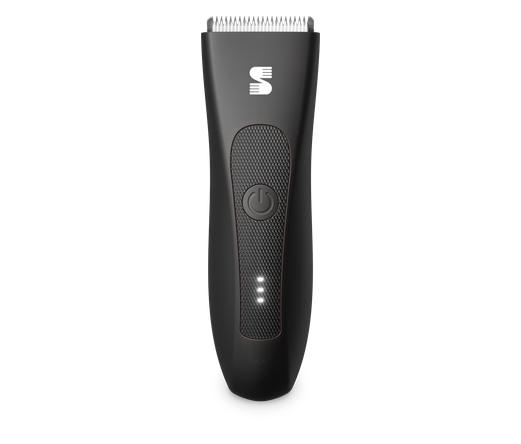
Choose a body hair trimmer by matching the tool’s role to the body area and the length you want to leave behind. Large areas such as the chest and legs usually benefit from efficient coverage, while smaller or curved areas require more control. Longer hair often needs to be shortened gradually before you attempt a closer finish.
A body trimmer is mainly designed for controlled shortening. It does not always produce the same result as a tool intended for a skin-level shave. Before choosing settings or attachments, decide whether you want to reduce bulk, maintain visible hair, create a neat outline, or finish as close as the tool comfortably allows.
Match the Tool to the Body Area
Body hair does not grow in the same pattern across the chest, stomach, legs, shoulders, and other below-the-neck areas. Hair density, surface shape, direction of growth, and the amount of space available to move the tool can all affect how you should trim.
The table below separates the main grooming priorities by area.
| Body area | Main grooming task | Useful tool role | Common trade-off |
|---|---|---|---|
| Chest | Reduce volume while keeping an even appearance | Wide, controlled trimming | Faster coverage may provide less precision around edges |
| Stomach | Blend hair into the chest or lower torso | Moderate-length trimming with steady control | Very short settings may make uneven growth more noticeable |
| Legs | Cover a large surface efficiently | Broad trimming passes | Moving too quickly may leave missed strips |
| Shoulders | Manage scattered or difficult-to-see hair | Maneuverable trimming | Visibility and reach can be more limiting than cutting ability |
| Underarms | Shorten hair in a curved, confined area | Controlled trimming with shorter passes | A wide cutting path may feel harder to position |
| Groin area | Manage length carefully around changing contours | Slow, controlled trimming | Closer work generally requires more time and attention |
| Arms | Maintain a natural-looking, even length | Guarded trimming | Cutting too short may create a sharper contrast at the wrists |
| Back | Reduce hair across a hard-to-reach area | Efficient coverage, sometimes with assistance | Reach and visibility may limit consistency |
For broad areas, consider how easily the tool can maintain contact while moving through longer passes. For curved or confined areas, prioritize maneuverability and the ability to make short, deliberate movements.
Do not assume that one setting will work across the entire body. A length that looks balanced on the chest may appear much shorter on the stomach, while the same attachment may be difficult to control around the underarms or groin.
Choose by Length Goal
Your desired finish should guide the tool choice before individual features do. The most useful question is not simply how short a trimmer can cut, but whether it can help you reach the intended length with enough control.
| Length goal | What you are trying to achieve | Suitable approach |
|---|---|---|
| Reduce heavy growth | Remove bulk without creating a close finish | Start with a longer setting and shorten gradually |
| Maintain visible hair | Keep the area neat while preserving a natural appearance | Use a guard that leaves a consistent, noticeable length |
| Create a shorter groomed look | Leave less visible hair without aiming for a skin-level result | Use a shorter setting after reducing longer growth |
| Define an outline | Clean up the border of the chest, stomach, or other area | Use slower passes and a more controlled tool position |
| Prepare for closer finishing | Shorten long hair before using another finishing method | Pre-trim the area to reduce pulling and repeated passes |
| Achieve the closest available trim | Remove as much visible length as the tool permits | Work gradually and avoid assuming every area will respond equally |
Longer body hair is usually easier to manage in stages. Beginning with the shortest available setting can overload the cutting area, make progress harder to see, and increase the number of repeated passes.
A gradual approach also allows you to stop at a length that suits the area. You may discover that a moderate setting gives the chest a balanced appearance, while the stomach or underarms look more even with a slightly different length.
Evaluate Settings and Tool Roles
A trimmer setting should help you control the amount of hair removed. It should not force you into the closest possible result every time.
Longer guards are useful when you are uncertain about the final length. They let you remove bulk while preserving room for adjustment. Shorter guards can then refine the result once the overall shape and density look even.
For men comparing a body hair trimmer for men, the practical question is whether the tool supports the areas and length-management tasks they actually perform. A tool intended for controlled body grooming should be evaluated by how it handles broad coverage, shorter detail work, longer-hair preparation, and transitions between different body contours.
Tool roles can also be separated by the finish they are designed to provide:
-
Body trimmer: Primarily manages length and reduces bulk across below-the-neck areas.
-
Detail trimmer: Helps shape smaller borders, transitions, and narrow sections.
-
Body groomer: May combine broader trimming with features intended for multiple body areas.
-
Shaver or finishing tool: Focuses on a closer result after longer hair has already been reduced.
These categories can overlap, so the product name alone may not explain how a tool performs. Focus on the task it is designed to complete rather than assuming that every “grooming” tool provides the same finish.
Attachments also involve trade-offs. A wider trimming head may cover the chest or legs efficiently, but it may be less convenient around tight curves. A smaller cutting area can improve positioning, although completing large areas may take longer.
Apply the Framework to Common Scenarios
Consider a man who wants to reduce thick chest hair without removing it completely. His first priority is not the closest cut. It is an even, controlled reduction that preserves visible hair.
He could begin with a longer guard, trim in manageable sections, and review the result before changing settings. Around the outer chest, shorter and slower passes can help create a cleaner boundary without making the entire area equally short.
Another person may want to shorten leg hair for easier maintenance while keeping a natural appearance. Because the legs provide a large working surface, efficient coverage matters. However, trimming should still follow a planned path so that narrow strips are not missed between passes.
A third scenario involves longer stomach hair that needs to blend with a shorter chest. Using one setting over both areas may produce an abrupt transition. A more controlled approach is to trim the chest first, leave the stomach slightly longer, and then use overlapping passes to soften the difference.
For underarm grooming, speed is less important than positioning. The area is curved, hair may grow in several directions, and the available working space is limited. Short passes from more than one direction may be more practical than trying to complete the area with a single movement.
When preparing longer hair for a closer finish, pre-trimming has a separate role. The initial pass removes bulk. A finishing method, when appropriate for the user and the area, can then focus on the remaining short hair instead of trying to handle the full length at once.
Use a Consistent Trimming Process
Start by checking the area in good lighting. Identify the direction of hair growth, any changes in density, and boundaries where you want the trimmed area to end.
Select a setting that leaves more length than your final target. Make the first pass without pressing harder to force a shorter result. Cutting length should come from the selected setting and repeated controlled passes, not extra pressure.
After the first pass, brush away loose hair and inspect the area from more than one angle. Uneven results often become easier to see once detached hair is removed.
Change to a shorter setting only when necessary. On large areas, use overlapping passes to reduce missed sections. Around curves or narrow areas, reduce the length of each movement and reposition the skin or tool as needed for visibility and control.
Cleaning also affects ongoing performance. Remove trapped hair according to the tool’s care instructions, and confirm whether individual parts are intended to be rinsed before exposing them to water. Wet-use or washable claims should be checked from the manufacturer’s instructions rather than assumed from the tool’s appearance.
Decision Checklist
Before selecting a body trimmer or trimming setting, confirm the following:
-
Which body areas will you groom most often?
-
Are those areas broad and flat, narrow, curved, or difficult to reach?
-
Do you want to reduce bulk, preserve visible hair, define an outline, or prepare for a closer finish?
-
Will you need several length settings rather than one fixed cutting length?
-
Does the cutting area provide enough coverage without becoming difficult to position?
-
Can longer hair be shortened gradually?
-
Are the attachments useful for your actual routine rather than included only as extras?
-
Can the removable parts be cleaned using a method you are comfortable following?
-
Are you willing to use different settings for different areas?
-
Can you inspect the result clearly before trimming shorter?
The right choice is the tool that gives you enough control over both area and length. Treat the chest, stomach, legs, underarms, groin, and other body areas as separate grooming tasks rather than applying one technique everywhere.
Start longer, work in stages, and adjust only after checking the result. This approach makes it easier to maintain a consistent appearance while avoiding unnecessary passes or a finish that is shorter than you intended.